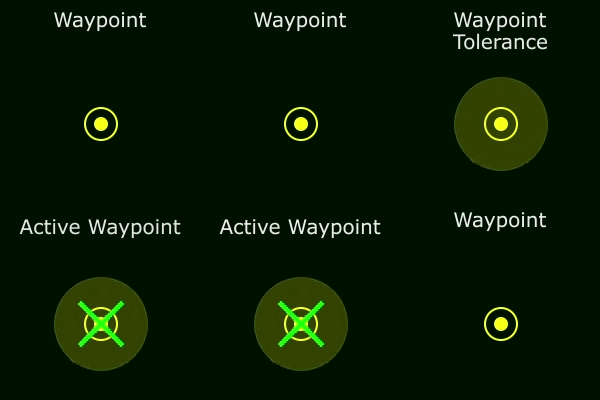
For today’s quick tip we’re going to take another look at waypoints. Specifically, the tolerance; it’s the circle around a waypoint that, when the vehicle reaches it, the system considers the waypoint achieved. Achieved just means that the vehicle has reached the waypoint. What happens next depends on your mission. |
 |
Generally, the smaller the tolerance is, the harder a vehicle is going to have to work to achieve the waypoint. The vehicle has to work a lot harder to achieve a waypoint with a .5m tolerance vs. a 3m tolerance.
What Happens when the Vehicle Achieves a Tolerance?
If your mission has a single waypoint, the vehicle would achieve it and then hold its position at the waypoint.
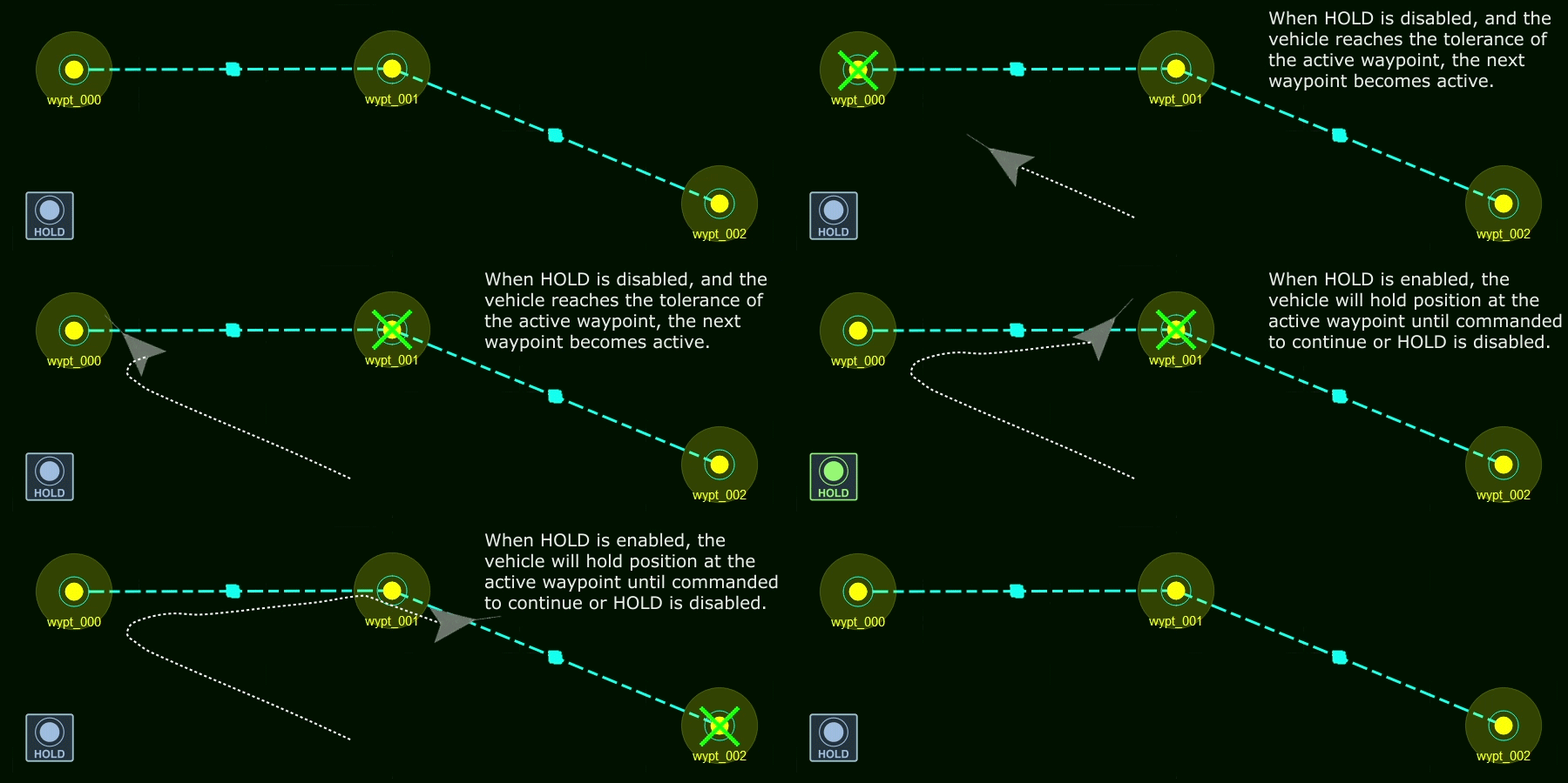
If the waypoint is part of a longer mission, as soon as the vehicle reaches the tolerance of the active waypoint (the one marked with a green X); the next waypoint will become the active waypoint, and the vehicle will begin traveling to the new active Waypoint. That will continue until the vehicle reaches the final waypoint in the mission, where it will hold position at the waypoint.
If you want the vehicle to stop at each waypoint and wait for you to command it to move to the next, you can set that in the mission control window by enabling Hold at Waypoint.

What if my Tolerances Overlap?
Another thing to be aware of is making sure not to overlap tolerances, it’s kind of like crossing the streams, generally you don’t want to do it. This tends to happen when you use the region tool to create a survey mission, and your tolerance is larger than your transect and it can look like erratic vehicle behavior.
To change the tolerance of a single waypoint, right click it on the Mission Panel and select Edit Waypoint, from there you can edit the waypoint tolerance.